Coast Line Maker V2.0 Просмотр ZIP-архива
Documentation/Tutorial.html
<!doctype html public "-//w3c//dtd html 4.0 transitional//en">

<html>

<head>

   <meta http-equiv="Content-Type" content="text/html; charset=iso-8859-1">

   <meta name="AUTHOR" content="Iain Murray">

   <meta name="GENERATOR" content="Microsoft FrontPage 4.0">

   <title>Coast-Line-Maker - Tutorial</title>

</head>

<body text="#0000FF" bgcolor="#00FFFF" link="#FF0000" vlink="#800000">


<h1>

Tutorial - Coast-Line-Maker V2.0</h1>


<h3><i>© Iain Murray, 2003</i></h3>


<hr>

<p>Please refer to the <b>Coast-Line-Maker</b>     <a href="Instructions.html">Instructions</a>
before working through this tutorial. </p>


<p>For basic troubleshooting information for <b>Coast-Line-Maker</b> (if you
have any problems getting the program to run), please see
<b><font face="Courier New">README.TXT.</font></b></p>


<p>The first commercial scenery to utilise <b>Coast-Line-Maker</b> is <b>ScotFlight's
"Scotland Scenery V1.0"</b>, which includes the scenery areas shown in
this tutorial - for more information on this scenery, visit the <a href="http://www.visualflight.co.uk/scotflight/">ScotFlight
main page</a>.</p>

<hr>

<h3>

Making a sample coastline with Coast-Line-Maker V2.0</h3>

<p>The best way to use <b>Coast-Line-Maker</b>  is as follows; we will follow
the procedure through with an example to correct the position of the existing
coast around a new airport. The following screen shot shows the new airport
(which is correctly positioned) but it is partly in the sea as the default coast
is in the wrong place:</p>

<p align="center"><img border="0" src="ErrolOriginal.jpg" width="640" height="480"></p>

<ul>
  <li>find the cell co-ordinates of your "target region":
    <ul>
      <li>looking at the region in <b>FS2002</b> (use <b><i>Shift-Z</i></b> to
        see your position), the centre of the new airport is at
        approximately N 56:24:8 W 3:11:5; exit <b>FS2002</b></li>
      <li>within <b>Coast-Line-Maker</b>, open the Cell Calculator (menu <b><i>Help/Cell
        calculator</i></b>), enter these
        target co-ordinates and calculate the LOD8 cell - this is gives [ 377,
        95 ]</li>
    </ul>
  </li>
</ul>


<p align="center"><img border="0" src="Dialog1.gif" width="474" height="248"></p>

<ul>
  <li>use the <b>CellGrid</b> files (included as part of this package) to generate a
    visible grid BGL for this LOD8 cell (edit the name and content of the given <font face="Courier New"><b>
    192_127_grid.txt</b></font> to reflect the required LOD8 cell co-ordinates, then
    drag-and-drop this file onto <font face="Courier New"><b>BGLC.EXE</b></font>
    to compile the scenery BGL); copy the BGL to an active <b>FS2002</b> scenery
    folder (remember to copy the grid texture <font face="Courier New"><b>LOD8define.bmp</b></font>
    to the corresponding texture folder too)</li>
  <li>re-run <b>FS2002</b>, and return to your target region - there should now
    be a red/blue cell grid over the area</li>
  <li>create a background map showing your "target region":
    <ul>
      <li>go into map view, and zoom out until you see the whole of the area
        required; rotate if necessary so that the LOD13 grid lines are parallel
        to the screen edges</li>
      <li>capture the screen (press <b><i>Alt-Prt Sc</i></b>) and paste the
        image into your graphics program (<b>MSpaint</b>, <b>Paint Shop Pro,</b>
        etc.)</li>
      <li>crop the image so that it includes a <i>whole number </i>of LOD13
        cells (and ensure again that these are parallel to the image edges)</li>
      <li>if you wish, overlay the image with the position of the new coastline
        that you wish to add</li>
      <li>if you wish, reduce the number of colours in the image (to decrease
        image file size)</li>
      <li>save the image (in BMP, GIF or JPG format)</li>
    </ul>
  </li>
</ul>


<p align="center"><img border="0" src="ErrolBackSmall2.gif" width="429" height="484">
<img border="0" src="ErrolBackBad1.gif" width="429" height="484">   <img border="0" src="ErrolBackBad2.gif" width="429" height="484"></p>
<ul>
  <li>within <b>Coast-Line-Maker</b>, load the background image and set its
    properties:
    <ul>
      <li>load the image saved above as the <b>Coast-Line-Maker </b>background
        image (menu <b><i>Background / Load background image</i></b>)</li>
      <li>in the Background Properties dialog, enter the relevant cell
        co-ordinates - this is how <b>Coast-Line-Maker </b>scales your image to
        fit the FS grid</li>
      <li>resize the <b>Coast-Line-Maker </b>window as required, and move the
        status panel window into a suitable position on the screen (it can be
        moved at any time if it is obscuring part of the background that you
        wish to work on; it can also be removed from the screen (click <b><i>Hide
        Status Panel</i></b>) and brought back (menu <b><i>Help / Show Status
        Panel</i></b> ). N.B. if the status panel is moved over the background
        image, it will delete any line graphics shown on the image - after
        moving, always click <b><i>Refresh Graphics</i></b> to reshow the
        lines. </li>
  <li>set your output preferences (menu <b><i>Output / Preferences</i></b>) as
    required</li>
  <li>save your <b>Coast-Line-Maker</b> project (menu <b><i>File / Save Project
    As ... </i></b>) with an appropriate name</li>
    </ul>
  </li>
</ul>
<p align="center"><img border="0" src="Dialog2.gif" width="746" height="484"></p>
<ul>
  <li>within <b>Coast-Line-Maker</b>, add coastal segments as required:
    <ul>
      <li> select the type of segment from the <b><i>Draw Mode</i></b>
        combo box on the status panel</li>
      <li>Land/Water mask polygons will fill in around the coast, so even if no
        visible coastline is required, you must enter a plain segment to act as
        the edge of the LWM polygons</li>
      <li>the ends of your coast segments should be :
        <ul>
          <li>in the same place as current coast positions (so that your new
            segments will join up with existing FS segments)</li>
          <li>at the edge of an LOD13 cell (i.e. with a co-ordinate of 0 or 255)</li>
        </ul>
      </li>
      <li>remember that any LOD13 cell which has<i> new coast</i> <i>added</i>
        into it will <i>automatically</i> have any <i>existing coast deleted</i></li>
      <li>save your project</li>
      <li>use the <b><i>Check VTP Data</i></b> button to check for any problems
        with your VTP data points before you proceed to add LWM polygons</li>
    </ul>
  </li>
</ul>


<p align="center"><img border="0" src="Dialog3.gif" width="1002" height="484"></p>
<ul>
  <li>within <b>Coast-Line-Maker</b>, add land and water polygons around the new
    coastline:
    <ul>
      <li>in this example, we have only existing water that needs to be made
        land, so we only need to add land polygons - but remember to cover all
        areas where existing water has to be excluded, including small corners!</li>
      <li>save your project</li>
    </ul>
  </li>
</ul>


<p align="center"><img border="0" src="Dialog4.gif" width="1002" height="484"></p>
<ul>
  <li>within <b>Coast-Line-Maker</b>, add any cell exclusions
    <ul>
      <li>there are three cells in the example where coast exists at present,
        but which will have <i>no coast </i>after modification - we thus need to
        <i>specifically</i> exclude the coast in these areas</li>
      <li>save your project</li>
    </ul>
  </li>
</ul>


<p align="center"><img border="0" src="Dialog5.gif" width="1002" height="485"></p>
<ul>
  <li>within <b>Coast-Line-Maker</b>, add any other segments (rivers, roads
    etc.) if required:
    <ul>
      <li>none needed for this project</li>
    </ul>
  </li>
  <li>save your project </li>
  <li>save the VTP and LWM data as assembler files, assemble them with <b>BGLC</b>
    and copy the new scenery files to <b>FS2002</b> (<b>Coast-Line-Maker</b> can
    do this automatically for you - set this via menu<b><i> Output / Preferences</i></b>)</li>
  <li>run <b>FS2002</b> to see the new coastline, which should now be as desired:</li>
</ul>


<p align="center"><img border="0" src="ErrolFixed.jpg" width="640" height="480"></p>


<hr>

<h3>

Another Example</h3>

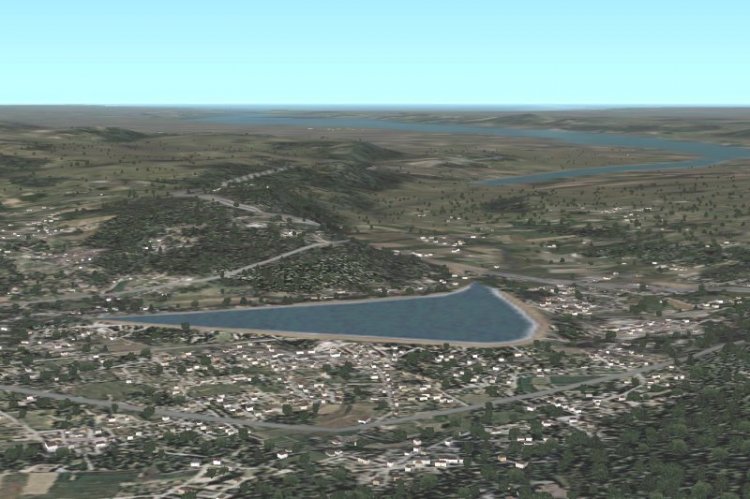
<p>Here is a more complex example of <b>Coast-Line-Maker</b> in action ... here
is the River Tay near Perth, Scotland:</p>


<p align="center"><img border="0" src="perthoriginal.jpg" width="800" height="533"></p>


<p align="left">However, the "lake" in the foreground should join to
the river estuary (middle distance), and also have an island in the middle of
it! Also, the road crossing the river in the centre of the picture incorrectly
goes up the cliff and along the ridge! Below is the <b>Coast-Line-Maker</b>
screen for this area, showing all the changes made. Note the red and blue lines,
which are the correct coast / road positions (these were drawn onto the
background map manually). At right, the road deviates in order to meet up with
the existing road segment off to the east. A small number of land polygons have
been used to cover the existing river where it is wrongly placed, and a series
of water polygons trace out the new course of the river. The black crosses show
where existing road has been cleared, and the blue crosses where a stream
segment has been cleared.</p>


<p align="center"><img border="0" src="PerthCLM.gif" width="800" height="581"></p>


<p align="left">And here is what the area <i>should</i> look like in FS; the
river is corrected, island added, and the roads now skirt round the hill (river
coastline segments have been used, rather than beach with waves):</p>


<p align="center"><img border="0" src="PerthFixed.jpg" width="800" height="533"></p>


<hr>

<h3>Coast-Line-Maker Online Gallery</h3>

<p style="margin-top: 0; margin-bottom: 0">More examples of <b>Coast-Line-Maker </b>use,
contributed by a range of users from around the world, are available to view on the
<a href="http://flightsim.computing.dundee.ac.uk/fsCLM3rd.html"> Coast-Line-Maker
user examples page</a>.</p>


<p style="margin-top: 0; margin-bottom: 0"> </p>


<hr>

<h3>

Acknowledgements and Legal Notice</h3>

<p style="margin-top: 0; margin-bottom: 0">Thanks to many subscribers to the
AVSIM scenery design forum (especially Richard Ludowise) for helpful comments
made in the forum, or to me directly. Without these comments, writing <b>Coast-Line-Maker</b>
would not have been possible. Special thanks to:</p>
<blockquote>
  <ul>
    <li>Richard Ludowise for permission to use his include files (which are in
      the public domain) within the <b>Coast-Line-Maker </b>package</li>
    <li>Dietmar Frenzl for permission to use his <b> LinkCLM</b> within the <b>Coast-Line-Maker
      </b>package</li>
    <li>all users of earlier versions of <b>Coast-Line-Maker</b> for their
      positive feedback and suggestions for improvements</li>
  </ul>
</blockquote>


<p>The<b> Coast-Line-Maker</b> program is distributed as Freeware but remains ©
Iain Murray, 2003, all rights reserved; it may not be distributed commercially
by any means without the express written permission of the author. Any sceneries
created using <b>Coast-Line-Maker</b> are the copyright and property of the
scenery author, but where such scenery is published (either commercially or as
Shareware or as Freeware), the scenery author should acknowledge the use of <b>Coast-Line-Maker</b>
in its creation; as a courtesy, the scenery author should also inform the <b><a href="mailto:[email protected]">Coast-Line-Maker</a></b><a href="mailto:[email protected]">
author</a> of publication.</p>


<p><b>Coast-Line-Maker</b> should not harm your computer or any data stored on it
but, if you imagine that it has, the author accepts no liability.</p>


<hr>

<p>Go to <a href="http://flightsim.computing.dundee.ac.uk">Iain Murray's flight simulator

page</a><p>Send an <a href="mailto:[email protected]">e-mail to
Iain Murray</a>

</body>

</html>
coastlm2.zip
| Имя файла | Дата | Размер |
|---|---|---|
| Documentation/BadBeach.gif | 29.01.2003 13:40 | 45 KB |
| Documentation/CornerCut.gif | 29.01.2003 13:40 | 47 KB |
| Documentation/devawar2.gif | 17.08.1999 12:29 | 10 KB |
| Documentation/Dialog1.gif | 29.01.2003 13:40 | 10 KB |
| Documentation/Dialog2.gif | 29.01.2003 13:40 | 140 KB |
| Documentation/Dialog3.gif | 28.02.2003 01:03 | 127 KB |
| Documentation/Dialog4.gif | 28.02.2003 01:07 | 130 KB |
| Documentation/Dialog5.gif | 28.02.2003 01:10 | 130 KB |
| Documentation/ErrolBackBad1.gif | 29.01.2003 13:41 | 125 KB |
| Documentation/ErrolBackBad2.gif | 29.01.2003 13:41 | 129 KB |
| Documentation/ErrolBackground.gif | 29.01.2003 13:42 | 536 KB |
| Documentation/ErrolBackSmall2.gif | 29.01.2003 13:42 | 137 KB |
| Documentation/ErrolFixed.jpg | 29.01.2003 13:42 | 62 KB |
| Documentation/ErrolOriginal.jpg | 29.01.2003 13:42 | 57 KB |
| Documentation/Flowchart.gif | 26.01.2003 00:01 | 12 KB |
| Documentation/Folders.gif | 24.02.2003 15:09 | 4 KB |
| Documentation/Instructions.html | 28.02.2003 17:03 | 28 KB |
| Documentation/Islands.gif | 28.02.2003 01:13 | 146 KB |
| Documentation/LostCoast.gif | 29.01.2003 13:42 | 61 KB |
| Documentation/MissingTile.gif | 24.02.2003 15:34 | 107 KB |
| Documentation/MissingTileCLM.gif | 24.02.2003 00:29 | 96 KB |
| Documentation/PerthCLM.gif | 29.01.2003 13:43 | 310 KB |
| Documentation/PerthFixed.jpg | 29.01.2003 13:43 | 93 KB |
| Documentation/PerthOriginal.jpg | 29.01.2003 13:43 | 92 KB |
| Documentation/SceneryLibrary.gif | 24.02.2003 12:57 | 18 KB |
| Documentation/Tutorial.html | 28.02.2003 17:04 | 12 KB |
| 192_127_Grid.txt | 28.01.2003 15:40 | 70 B |
| Cell_Grid.inc | 10.10.2002 19:37 | 181 KB |
| CLM-thumb.gif | 28.02.2003 16:34 | 7 KB |
| CoastLineMaker.exe | 28.02.2003 17:00 | 220 KB |
| LinkCLM.ZIP | 28.02.2003 17:05 | 337 KB |
| LOD8define.bmp | 03.10.2002 15:31 | 86 KB |
| README.TXT | 28.02.2003 16:20 | 8 KB |
| TDFHeaders.inc | 10.09.2002 20:16 | 3 KB |
| TDFMacros.inc | 13.09.2002 14:25 | 16 KB |
| avsim_ru.diz | 14.03.2004 00:16 | 382 B |
| Итого: | 3 MB | |
The program for creating landscapes in FS2002
→ Size:
3 MB
→ Date:
23 years ago (01.03.2003 13:43)
→ Author:
Iain R. Murray
→ License:
Freeware - Free version, Do Not Redistribute
→ Downloaded:
425 time(s)